Table of Contents
In addition to the interactive installation described in the UCS manual [ucs-handbuch], profile-based installation of UCS is also possible. In this method, the settings for the UCS installer are specified in a profile file. If all the required settings are included in the installation profile, it is possible to perform the installation fully unattended. Section 1.3 describes the structure of the profile file and the variables used in it.
Profile-based installations can be performed in two ways:
An installation profile is a normal text file which can be edited with any editor. Installation profiles must be saved in UTF-8. The settings must be entered in the following format:
Variable='Value1 Value2'
Multiple values for one variable are separated by blank spaces. Lines are commented out with #.
It is not necessary to write an installation profile from scratch every time:
The settings performed in the Univention Installer are saved in the file /etc/univention/installation_profile (with the exception of the root password).
This file can be used as a template for an installation profile.
Note that the partitioning information from that file is hardware specific and probably needs to be specified as
documented in Section 1.3.6.
The following installation profile installs a master domain controller with English language and country settings on which the complete hard drive is managed in an LVM. Samba 4 is installed.
#### UCS-Profile ####

# [Time zone]
timezone='Europe/London'
locale_default='en_GB.UTF-8:UTF-8'
locales='en_GB.UTF-8:UTF-8'

# [Language]
language='en'

# [System role]
system_role='domaincontroller_master'

# [Settings]
domainname='company.example'
hostname='master'
ldap_base='dc=company,dc=example'
windows_domain='COMPANY'
root_password='secret'

# [Source device]
cdrom_device='/dev/sr0'

# [Partitioning]
create_partitiontable='/dev/sda'
disks='/dev/sdb /dev/sda'
partitiontable_type='gpt'
auto_part='yes'
bootloader_record='/dev/sda'
boot_partition='/dev/sda1'

# [Keyboard]
keymap='uk'

# [Software]
packages='univention-s4-connector univention-samba4'

# [Network]
nameserver_1='192.0.2.3'
eth0_broadcast='192.0.2.255'
dns_forwarder_1='192.0.2.3'
eth0_netmask='255.255.255.0'
eth0_network='192.0.2.0'
gateway='192.0.2.240'
eth0_ip='192.0.2.134'
Additional templates are included on the installation medium in the directory profiles/.
The following profile variables are used to control the progress of the installation. For example, it is possible to include a password prompt, run programs before and after the installation or allow the entry of the value for individual variables during the installation.
Table 1.1. Profile variables - Installer
| Name | Function |
|---|---|
profile_password | Here one can specify the password that must be entered when the installation profile is used. This is not a security feature as the password is saved in the profile in plain text. However, a password can serve as a safe guard mechanism against an incorrectly selected profile. |
to_check | Here one can specify variables whose values must be entered or checked at the beginning of the installation. These variables can be used to install a large number of computers of the same type with the same profile in cases where only individual settings such as IP addresses and the computer name are different. If more than one value is specified, the values are separated by blank spaces. |
check |
If this variable is used, only the variables listed
are requested. Other missing variables are not taken into
account. check supports the
parameter all. When check=all is used, all profile
variables are requested, even those already set (same as interactive
installation). If more than one value is specified, the values are
separated by blank spaces.
|
scan |
This option provides mechanisms with which the values
of the profile variables can be retrieved dynamically during the
installation. At present, hostname is the only profile
variable supported. If scan=hostname is entered, the
computer name is procured via the computer's IP address by means of
a name server request during the installation. scan supports
the parameter all. If scan=all is used, all the
profile variables supported by scan are imported during the
installation. If more than one value is specified, the values are
separated by blank spaces.
|
ignore |
The value for the ignore option can
include profile variables that are not to be checked. If, for
example, scan=hostname is set, ignore=hostname
must also be set. ignore must also be used if system
settings are to be set using scripts
preinst_hook, postinst_hook). ignore
supports the parameter all. If ignore=all is used, no profile
variables are requested unless they are specifically set. If more than
one value needs to be specified, the values must be separated by blank spaces.
|
cdrom_device |
The device used to provide the packages during installation, which is normally auto-detected.
It can either be a local CD-ROM or DVD device (e.g., /dev/cdrom) or an NFS share (e.g., nfs:).
|
premount_hook |
Here one can specify scripts which should be run before the UCS system is boot-strapped.
The scripts must be provided in the directory script/ on the installation medium.
If more than one script is entered, they must be separated by blank spaces.
|
preinst_hook |
Here one can specify scripts which should be run before the installation of role-specific packages begins.
The scripts must be provided in the directory script/ on the installation medium.
If more than one script is entered, they must be separated by blank spaces.
|
postinst_hook |
Here one can specify scripts which should be run after the installation but before the final update process.
The scripts must be provided in the directory script/ on the installation medium.
If more than one script is entered, they must be separated by blank spaces.
|
auto_reboot |
The system is automatically restarted after the installation if the parameter is set to true or yes.
This parameter should only be used in network-based installations in combination with the installation_feedback_host, as the computer setting must be reset at the end of the installation.
The installation would otherwise start from the beginning again the next time the system starts.
|
installation_feedback_host | If univention-net-installer-daemon has been setup to reset the option in the Univention Management Console (see Section 1.4.1), this variable specifies the IP address of the host where the daemon is running. |
installation_feedback_port | If the daemon for resetting the flag has been configured (see profile variable installation_feedback_host), this variable can be used to specify the port where the daemon is listening for connections. This variable only needs to be configured if the daemon is running on a non-default port. If unset, 49173 is used. |
The following profile variables can be used to specify basic properties of the computer such as the computer name, its role within the UCS domain and the name of the domain the computer should join.
Table 1.2. Profile variables - System properties
| Name | Function |
|---|---|
system_role |
The system role.
You may choose from domaincontroller_master, domaincontroller_backup, domaincontroller_slave, memberserver and base.
The properties of the system roles are described in the domain services chapter of the UCS manual [ucs-handbuch].
|
hostname |
The computer name.
The name must only contain the letters a to z in lowercase, the figures 0 to 9 and hyphens.
Although underscore are allowed as well, they should not be used as they are not supported everywhere.
The name must begin with a letter.
|
domainname | The name of the DNS domain in which the computer is joined. |
fqdn |
This value only has informative character.
It is calculated by concatenating the values of the variables hostname and domainname.
|
windows_domain | The name of the NetBIOS domain used by Samba. This variable should only by defined for the system role master domain controller. |
locales | Localisation packages to be installed (locales). If more than one locale is specified, the locales are separated by blank spaces. |
locale_default |
The standard locale for the computer, e.g. en_GB.UTF-8:UTF-8.
More information on system locales can be found at [locales].
|
country, keymap |
The keyboard layout for the computer, specified in the form of an X11
keymap entry, e.g. de-latin1.
|
timezone |
The time zone for the computer,
e.g. Europe/Berlin. A complete list of possible
configuration options is shown in the Basic
settings module of the Univention Management Console.
|
root_password | The password for the root user for this computer. On a master domain controller, this password is also used for the Administrator's password. |
use_efi |
Whether a system is using the Unified Extensible
Firmware Interface (UEFI) boot mechanism is detected automatically.
This variable can be used to override the automatic
detection. Possible values are yes and
no.
|
The entries domain_controller_account
and domain_controller_password are essential for computers
intended to join the domain.
Table 1.3. Profile variables - LDAP settings and domain joins
| Name | Function |
|---|---|
auto_join |
As standard, all computers apart from the base system and master domain controller attempt to join the UCS domain in the course of the installation.
If this parameter is set to false, the automatic domain join is deactivated.
|
domain_controller_account |
The name of a user authorised to perform the computer's domain
join. In the standard setting this is the user
Administrator. The entry is essential on systems
intended to join the UCS domain.
|
domain_controller_password |
The password for the
domain_controller_account. The entry is essential
on systems intended to join the UCS domain.
|
ldap_base |
The base DN of the LDAP domain. In general, the
base DN dc=company,dc=example is used in a
domain company.example. This variable is only evaluated on the
system role master domain controller.
|
ldap_position | The position as DN in the LDAP directory at which the computer object should be saved when joining the domain. If this variable is not set, the object is saved in the standard container for computers with its system role. |
call_master_joinscripts |
If set to false, the join-scripts are not executed on the system role master domain controller.
This is only required for special situations like setting up UCS systems in Appliance mode.
|
The following profile variables can be used to specify the network configuration of the computer. There is a restriction on the number of network cards used. A maximum of four physical network cards can be used with four virtual interfaces for each physical one.
General information on the network configuration and the use of the name servers can be found in Chapter Network configuration of the UCS manual [ucs-handbuch].
The use_external_nameserver parameter can be used to
suppress the use of the local name server. The external name server
must be specified in the profile with the nameserver_1
parameter.
The settings for network cards must be performed completely. It is not
possible to leave individual settings blank. For example, if there is
no IP address for the device eth0 in the profile, in addition to the
IP address, the eth0_netmask will also be requested.
Table 1.4. Profile variables - Network configuration
| Name | Function |
|---|---|
eth |
If this parameter is set to dynamic or dhcp, the network interface ethN procures its network configuration via DHCP.
The settings of eth, eth, eth, eth, nameserver_ and gateway then become optional, but can still be used to over-write the configuration provided by DHCP.
If no DHCP offer is received, a random IP address from the link-local network 169.254. is used.
|
eth | The IPv4 address of the physical network interface ethN. |
eth | The network mask of the subnetwork from which the IPv4 address of ethN originates. |
gateway | The IPv4 address of the gateway which the computer should use as standard. Alternatively, one can specify the computer name or the FQDN that can be resolved into the IP address. |
eth | The IPv6 address of the physical network interface ethN in static configuration. |
eth | The prefix of the IPv6 address of the physical network interface ethN in static configuration. |
gateway6 | The IPv6 address of the gateway which the computer should use as standard. It is not obligatory to enter a gateway for IPv6, but recommended. An IPv6 gateway configured here has preference over router advertisements, which might otherwise be able to change the route. |
eth |
If this setting is set to yes, the
stateless address auto-configuration (SLAAC) is used. In this, the IP
address is assigned from the routers of the local network segment. If
the variable is set to no, the configuration is performed
statically via eth and eth (see
below).
|
use_external_nameserver |
If this parameter is set to true, the DNS service
automatically installed on every domain controller is not used. Instead, the
variable nameserver_ is used to specify an external name
server. If the parameter is set to false or not set at all, the
internal name server will be used in accordance with the UCS
standard.
|
nameserver_1, nameserver_2, nameserver_3 | The IP address of the name server which should perform the name resolution. It is possible to specify up to three name servers. |
dns_forwarder_1, dns_forwarder_2, dns_forwarder_3 | The IP address of the name server intended to serve as the forwarder for a locally installed DNS service. It is possible to specify up to three forwarders. |
proxy_http |
The URL of a proxy server to be used when
downloading accessing the Internet. The specified URL is adopted in
the Univention Configuration Registry variables proxy/http and proxy/ftp. This setting is only required
if packages are to be installed which download additional packages
from external web servers; e.g., the installation program for the
Flash plugin.
Example: proxy_http=http://proxy.company.example:8080 |
The following profile variables refer to software packages which are to be installed on the computer.
Table 1.5. Profile variables - Software selection
| Name | Function |
|---|---|
packages | Each system role has a preselection of software which is installed on the system. This settings names packages which are additionally installed. If more than one package is specified, the packages are separated by blank spaces. |
local_repository (Unused since UCS-3.0) |
If this parameter is set to true,
a local repository is set up and the contents of the installation DVD
copied (see Chapter Software deployment of the UCS
manual [ucs-handbuch].
|
The configuration of the partition settings can be performed completely profiled-based. Existing partitions can be deleted or mounted as data partitions without reformatting; new partitions can be set up in free areas.
In contrast to the remaining variables, the profile variables for hard drive configuration have an extended syntax.
part_delete causes deletion of
partitions; lvmlv_delete can be used to delete LVM logical volumes.
The profile variable auto_part activates the automatic
partitioning.
The profile variable dev_ specifies whether and how
the partition should be formatted and where the partition should be
mounted in the file system. The names used for the profile variable
must be furnished with running numbers starting with zero (Numberdev_0,
dev_1, dev_2, ...) The profile variable for the configuration of
the partitions has the most extensive syntax. The entry type, device
file, partition type, partition format, file system, start and end
cylinder of the partition, directory under which the partition should
be mounted and additional options parameters must be specified.
The first parameter describes the entry type. A difference is made
here between PHY for a physical partition and LVM for a
LVM logical volume entry. As a second parameter, the device name of the partition
(e.g., /dev/sda1) or the logical volume
(e.g., /dev/vg_ucs/log_vol_1) must be entered.
The third parameter describes the partition type. For PHY
entries, 0 means primary, 1 means logical and 2
means extended. For LVM entries, only the value LVMLV
for a LVM logical volume is currently recognised. The fourth parameter
determines whether the partition is formatted during the installation
(value 1) or not (value 0). Extended partitions are
assigned the value 0. If you do not want to format an existing
partition, alternatively, the parameter only_mount can be set
on the third position and 0 can be set in the fourth
position. The fifth parameter describes the file system to be
used. You can choose between ext2, ext3, ext4,
linux-swap None (for extended partitions and partitions
to which no file system is to be ordered) and xfs.
Parameters six and seven describe the start and end cylinders of the
partition. If 0 is entered as the end cylinder, the partition
is set from the specified start cylinder to the end of the hard
drive. The start and end points of the partition can also be specified
in kilobytes/1024 bytes (k or K), megabytes/1048576 bytes (m or M) and
gigabytes/1073741824 bytes (g or G).
The end can be specified relative to the start point (e.g., `10g
+2g'). Bytes and cylinder specifications can be mixed (e.g., `12g
0' for a partition beginning at 12 gigabytes and ending with the last
cylinder). For an LVM entry, the start point should always be
set as 0 and its end point should be set to the required size of the
LVM logical volume.
The following provides an example:
bootloader_record="/dev/sda"
disks="/dev/sda"
part_delete="all"
lvm_delete="/dev/vg_ucs/*"
dev_1="PHY /dev/sda1 0 1 ext3 0.032256M 106.928128M /boot None"
dev_0="LVM /dev/vg_ucs/rootfs LVMLV 1 ext3 0.0M 4000M / None"
dev_4="LVM /dev/vg_ucs/vol2 LVMLV 1 ext3 0 4000M None None"
dev_3="PHY /dev/sda3 0 0 None 633.34656M 0 None lvm"
dev_2="PHY /dev/sda2 0 1 linux-swap 106.92864M 633.346048M None None"
The eighth parameter stands for the mount point. For swap partitions and other
partitions without a mount point None should be entered.
lvm can be entered as the ninth parameter to mark the partition
as a LVM physical disk. In all other cases, None should be entered.
Table 1.6. Profile variables - Partitioning
| Name | Function |
|---|---|
bootloader_record |
The device onto which the bootloader Grub is installed into the master boot record.
It is detected automatically in the basic setting, but if more than one disk is found an interactive selection needs to be made.
This variable can be used to specify the device. Example: /dev/sda
|
boot_partition |
This variable can be used to specify a partition, into which the bootloader Grub installs its additional modules.
The partition should be located at the beginning of the first disk to guarantee proper BIOS support.
Example: /dev/sda1
|
part_delete |
The names of the partitions to be deleted
during the installation. The name used by the operating system
(e.g., /dev/sda4) should be entered here. In addition, the
value all is supported, which causes the deletion of all the partitions
on all detected hard drives.
|
lvm_delete |
The names of the logical volumes to be deleted during the installation.
Two different spellings can be used in the entry.
The first is to specify the full device file name (e.g., /dev/vg_ucs/rootfs) or just the combination of LVM volume group and LVM logical volume (e.g., vg_ucs/rootfs).
The second is to delete all LVM logical volumes from an LVM volume group by specifying the LVM volume group (e.g., /dev/vg_ucs/* or vg_ucs).
|
dev_ | Information on the partitions in the order entry type, device file, partition type, formatting yes/no, file system, start and end point, mount point, additional options. |
partitiontable_type |
This variable is used to specify the type of the partition table to create.
If this variable is set to gpt, the partitioning is performed using the GUID
Partition Table standard (GPT).
If configured to mbr or msdos, a master boot record (MBR) is used (this is deprecated since UCS-3.0).
The default is still mbr.
|
create_partitiontable | This variable can be used to specify a space separated list of devices on which a partition table should be created. Unpartitioned disks can not be used for installations and are ignored, which causes auto-partition to fail. |
auto_part |
Depending on partitiontable_type different schemes to automatically partition the disks can be selected:
|
disks |
A space separated list of disk devices (e.g., /dev/sda) used for auto-partitioning.
It is incaompatible with create_partitiontable, which superseeds this disks setting.
|
A SSL certification infrastructure is set up during installation of a master domain controller. If no settings are configured, automatic names are given for the certificate.
Table 1.7. Profile variables - SSL
| Name | Function |
|---|---|
ssl_country | The ISO country code of the certification body appearing in the certificate (root CA), specified with two capital letters. |
ssl_state | The region, county or province that appears in the certificate of the root CA. |
ssl_locality | Place appearing in the certificate of the root CA. |
ssl_organization | Name of the organisation that appears in the certificate of the root CA. |
ssl_organizationalunit | Name of the organisational unit or department of the organisation that appears in the certificate of the root CA. |
ssl_email | E-mail address that appears in the certificate of the root CA. |
Network-based, profile-based installations via PXE are performed with the Univention Net Installer, which can be set up using the univention-net-installer package. In addition, a DHCP server is required. If the DHCP server and the PXE server of the Univention Net Installer are operated on separate systems, the PXE server must be assigned via a DHCP boot policy.
Univention Net Installer supports both the interactive and profile-based installation.
Univention Net Installer requires a local repository as a package
source (see the software deployment chapter of the UCS manual [ucs-handbuch]).
The profiles must be copied into the directory
/var/lib/univention-repository/profiles/ on the
repository server.
A computer to be installed via Univention Net Installer must firstly be registered in the computer management of the Univention Management Console. The following values must be set as a minimum:
The option must now be activated in the tab under .
The name of the installation profile under
/var/lib/univention-repository/profiles/ can be
entered under . The
file name of the profile should be entered without specifying the
path.
Options entered under are passed on to the kernel in network-based installations, e.g., for the deactivation of ACPI during system start.
A profile-based installation is performed as standard in installations with the Univention Net Installer. If one wishes to perform an interactive installation instead, the option must be activated. If any installation profile is entered, then it is no longer used.
A PXE configuration file is created for every computer object
under /var/lib/univention-client-boot/.
It must be verified that the boot order in BIOS of the system to be installed prefers a PXE network boot over hard disks or CD-ROMs.
On the next restart of the computer it will boot via PXE and is installed via the network. If no profile has been specified, a list of existing profiles is shown at the beginning of the installation for selection. If the selected profile includes an error, meaning it can't be loaded, an error message is emitted. It is then possible to select another profile.
User inputs are only required for profile-based installations if a
profile password is specified in the profile or variables with
to_check are explicitly entered for requests (see
Section 1.3.1). If
to_check is not used, a request may be given for
essential variables with missing or erroneous values.
By default the option needs to be reset manually after the installation has finished. If the package univention-net-installer-daemon is installed on the server, the flag can be reset automatically. The daemon needs to be configured in the installation profile using the variables installation_feedback_host and installation_feedback_port (see Section 1.3.1).
If the univention-net-installer-daemon is not used, the option must be unset manually after the installation. Otherwise the computer will be reinstalled every time the host is booted!
Univention Installer can procure the installation profile in three ways:
profiles/
directory.First the option must be selected in the main menu of the Univention Installer and then the kernel to be used (e.g., ) must be the selected in the following menu.
If the installation profile was stored on the DVD, must be selected; or must be selected if the files are to be procured from a USB stick or disk.
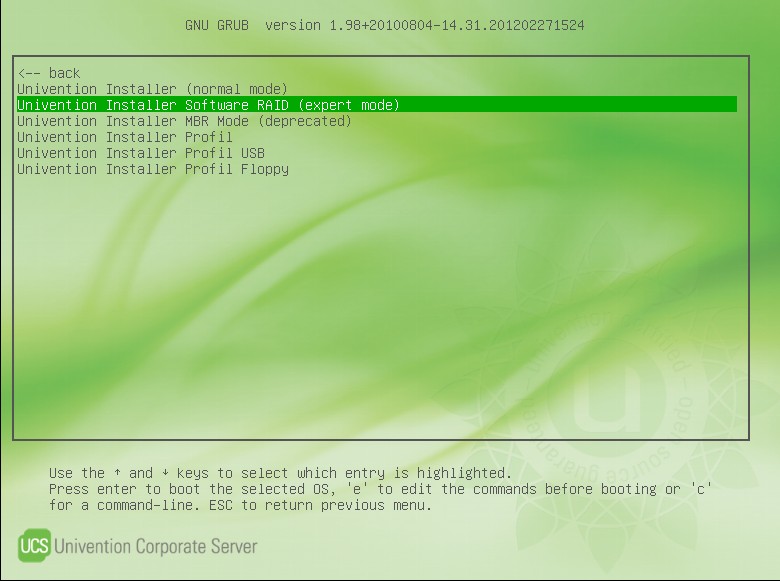
If has been selected in the Univention Grub Boot Menu, the partitioning menu during the installation process is replaced with a command line shell, which allows arbitrary partitioning configuration.
This mode can, for example, be used to set up a software RAID or an encrypted hard drive partition. After partitioning, the interactive installation is continued.
The following programs are available for partitioning:
pvcreate, pvdisplay Editing of LVM physical volumeslvcreate, lvdisplay Editing of LVM logical volumesvgcreate, vgdisplay Editing of LVM volume groupsfdisk Partitioning tool for MBR on the command linegdisk Partitioning tool for GPT on the command lineparted Partitioning tool on the command linecfdisk Menu-guided partitioning tool in text modemkfs.* Tools to create filesystemsmdadm Program for configuring software RAIDsSpecial Univention Configuration Registry variables with partitioning information must then be set. The installer evaluates these later and mounts the corresponding partitions during the installation.
There are three variables for every partition to be mounted:
installer/device/NUMBER/name: the partition's device file,
for example /dev/sda1, /dev/hda1 or
/dev/vg_ucs/rootfsinstaller/device/NUMBER/fs: the partition's file system type,
e.g. ext3, ext4,
xfs or linux-swapinstaller/device/NUMBER/mp: the mount point, e.g.
/. If None is specified here, the partition is
not mounted (e.g. for swap partitions)
The NUMBER value at the third position in the variable's name
increases for every device file to be mounted. The information for
three partitions should thus be saved under
installer/device/0, installer/device/1 and
installer/device/2. The root partition, in other words the
partition which will later be mounted under /, must
always be configured under installer/device/0.
If e.g. the following partitions have been setup:
/dev/sda1 with ext3 on //dev/sda2 swap/dev/sda5 with xfs on /varThe following Univention Configuration Registry variables must then be set:
# Root partition
ucr set installer/device/0/name=/dev/sda1
ucr set installer/device/0/fs=ext3
ucr set installer/device/0/mp=/

# Swap
ucr set installer/device/1/name=/dev/sda2
ucr set installer/device/1/fs=linux-swap
ucr set installer/device/1/mp=None

# Data partion
ucr set installer/device/2/name=/dev/sda5
ucr set installer/device/2/fs=xfs
ucr set installer/device/2/mp=/var
Following disk partitioning, creation of filesystems and setting up the Univention Configuration Registry variables, the key combination Alt+F1 can be used to return to the installer and continue with the installation.
A RAID (redundant array of independent disks) is used to increase data security and/or data throughput via the organisation of several hard drives in a logical drive. RAID is usually setup using a designated hardware RAID controller, but can also be implemented with a software-based setup.
In Univention Corporate Server, software RAIDs can be created and managed with the
mdadm program. At least two hard drive partitions
(normally on different hard drives) are combined into one RAID
device. This RAID device can be accessed, formatted and mounted via a
device file like a normal partition.
The kernel modules responsible for software RAID (raid0,
raid1, raid10 and raid5) are included in the
Linux kernel and loaded automatically.
Start the installation in expert mode as described in Chapter 2.
In this example it is assumed that two hard disks with identical sizes are present:
/dev/sda and /dev/sdb.
The following commands prepare the hard disks for RAID 1 by setting up 3 partitions. A small
partition to hold the bootloader, a partition for /boot and the rest of the available space
for a LVM which will hold the operating system.
parted -s /dev/sda mklabel gpt
parted -s /dev/sda mkpart primary 1 10
parted -s /dev/sda mkpart primary 10 500
parted -s /dev/sda mkpart primary 500 100%
parted -s /dev/sda set 1 bios_grub on
parted -s /dev/sda set 2 raid on
parted -s /dev/sda set 3 raid on
To prepare the second disk, each of the above commands has to be executed with the
parameter /dev/sda changed to
/dev/sdb.
The next step is to setup the RAID 1 for the /boot partition and the LVM Partition.
mdadm --create --auto=md /dev/md0 --level=1 --raid-devices=2 \
	/dev/sda2 /dev/sdb2
mdadm --create --auto=md /dev/md1 --level=1 --raid-devices=2 \
	/dev/sda3 /dev/sdb3
After the RAID 1 has been set up the devices have to sync. This takes some time depending on
the disk size. The current status and remaining time
can be checked with cat /proc/mdstat. Only after the devices are synced the
filesystems can be setup.
mkfs.ext4 /dev/md0

lvm pvcreate /dev/md1
lvm vgcreate vg_ucs /dev/md1
lvcreate -L2G -n swap vg_ucs
lvcreate -l100%FREE -n rootfs vg_ucs

mkswap /dev/mapper/vg_ucs-swap
mkfs.ext4 /dev/mapper/vg_ucs-rootfs
Before continuing the installation the following UCR variables have to be set to inform the installer about the partition layout.
ucr set installer/device/0/fs=ext4
ucr set installer/device/0/mp=/
ucr set installer/device/0/name=/dev/mapper/vg_ucs-rootfs
ucr set installer/device/1/fs=ext4
ucr set installer/device/1/mp=/boot
ucr set installer/device/1/name=/dev/md0
ucr set installer/device/2/fs=linux-swap
ucr set installer/device/2/mp=None
ucr set installer/device/2/name=/dev/mapper/vg_ucs-swap
To continue the installation
Alt+F1
has to be pressed to return to the menu. When asked
where to install the Grub bootloader, /dev/sda should be selected.
After rebooting, Grub has to be installed on all hard disks to ensure that it can be executed should one drive fail. This is done with the following commands:
grub-install /dev/sda
grub-install /dev/sdb
The configuration file /etc/mdadm/mdadm.conf contains
general settings and a description of the RAID level and the
partitions involved for every RAID.
# by default, scan all partitions (/proc/partitions)
DEVICE partitions

# auto-create devices with Debian standard permissions
CREATE owner=root group=disk mode=0660 auto=yes

# instruct the monitoring daemon where to send mail alerts
MAILADDR root

ARRAY /dev/md0 level=raid1 num-devices=2 UUID=96d170c7:aee25771:2bb7a921:880c37fd
The RAIDs entered in this file (ARRAY) can be determined with the
mdadm --detail --scan command. The daemon is configured
in the /etc/default/mdadm file. The entry of
AUTOSTART=true is important here to ensure that the RAIDs are
automatically updated when the computer is started.
The software package mdadm automatically detects all RAIDs
during the installation and creates the configuration files
/etc/mdadm/mdadm.conf and /etc/default/mdadm In
other words, no additional adjustments to the RAID configuration files
are necessary during the installation.
Further information on software RAIDs and the partitioning on the command line can be found at the following URLs.
[ucs-handbuch] Univention GmbH. 2014. Univention Corporate Server - Manual for users and administrators. http://docs.univention.de/manual-3.2.html.
[locales] Debian Project. 2013. Locale - Debian Wiki. https://wiki.debian.org/Locale.